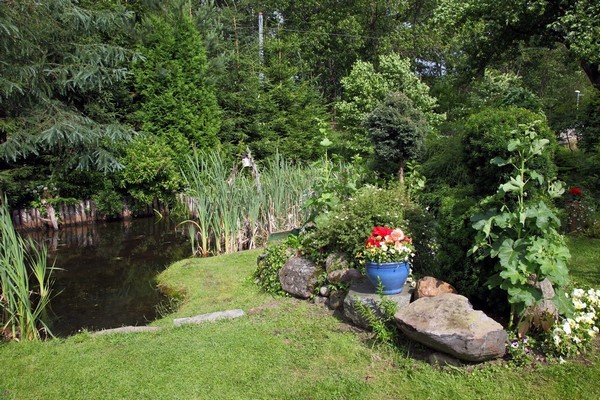
Gardening in Shade - Planting Basics

Planting is a no-brainer...right? Wrong! One of the easiest ways to waste money is to buy a plant, dig a hole in what passes for soil in your yard and plop it in. Unless you are among the few blessed with deep loam soil, some plants will survive this, but a great many will depart to that great compost heap in the sky. Many gardeners, when faced with the death of a plant, immediately start to blame the nursery who sold them the plant, insects or disease when the real cause is improper planting techniques.
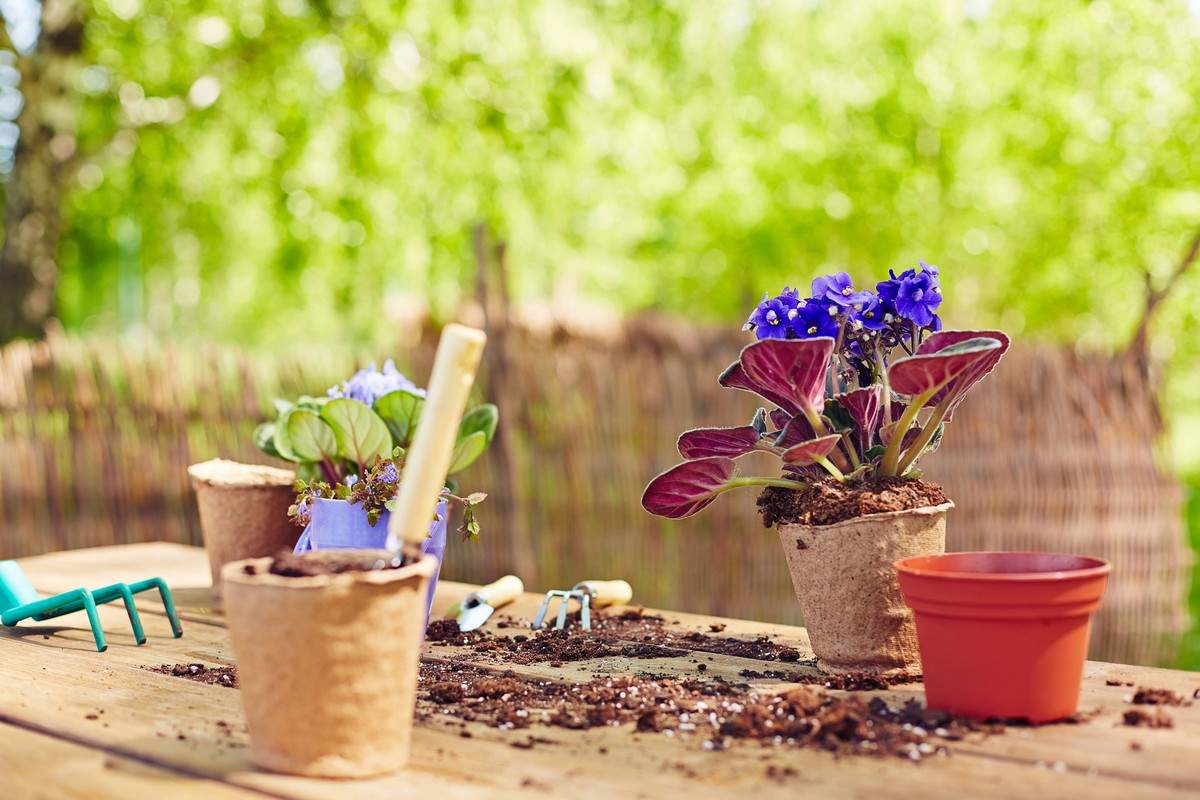
Soil Preparation

You may have read the old adage - "Plant a $1.00 plant in a $10.00 hole". It's not far off the mark.

The soil in which you place your plant is as important to your plant as what you eat and where you live are to you. Even more so, since plants can't get up and move if the cupboard is bare or the room it has is too small, and you can.

The soil in which you place your plant is as important to your plant as what you eat and where you live are to you. Even more so, since plants can't get up and move if the cupboard is bare or the room it has is too small, and you can.

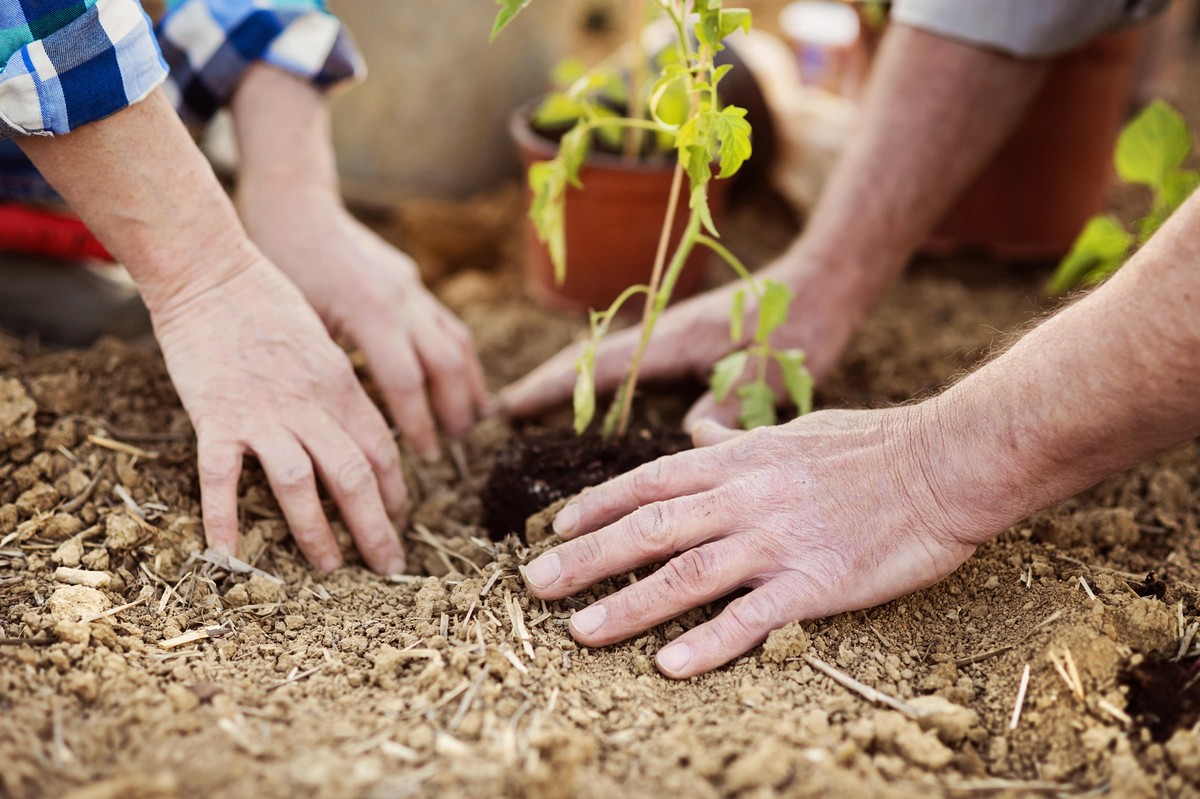
Plant roots are their lifelines. If the roots can't function properly, the plant either grows poorly or dies. Large, vigorous root masses are way more important than flowers to a plant. Roots need water, air and nutrients. They constantly grow at the tips seeking these elements, so it follows that if the soil around the roots is loose (fluffy, open, workable - whatever you like to call soil of good tilth), they will be able to grow more easily than if it is a solid block of clay concrete. Loose soil also permits water to penetrate more easily and deeply and contains more air spaces for the exchange of gasses necessary for plant life. Of course, I am not referring to bog or water plants here, but to the majority of plants we grow in our gardens.

I also need to point out that I garden on a clay based soil. Those of you who garden on sandy soil will have more problems retaining moisture and nutrients and fewer problems providing plants with open soil. The planting techniques will be similar, no matter what soil you have, but the soil preparation I describe will be slightly different for you.

Clearing

Once you have decided where to put your plant, the first step is clearing the soil of whatever vegetation is currently occupying it. You can hand weed - which I recommend because intimate contact with your soil helps you understand it - or you can use an herbicide.

If you hand weed, make sure that you remove the roots and crowns of the plants you pull, not just the stems. Many weeds will regenerate from their crowns or roots, so you want to make sure you remove those.

To Dig or Not To Dig

There are probably as many methods of preparing soil for planting as there are gardeners; everybody develops their own "best" way after a while. You can dig soil by hand, turn it with a tiller or plow or leave the native soil, covering it with organic material (variations on the lasagna bed method). Your soil, your physical abilities and what you intend to plant will help determine which method you use. I've tried everything but using a plow. They all have their plusses and minuses.

Happy Planting! If you need help planting your next tree or an overall garden maintenance is needed, check out Portland TT’s services. See ya' later.


-----------------------------------------------------------


Organic Gardening - Assembling Your Organic Arsenal

Fall is a great time of year to start your conversion to organic gardening, if you don’t practice natural methods already. The heat lessens, we get a bit more rain, and plants make a final surge before heading into dormancy. Now is the time to start gathering (or updating) your organic arsenal!

Ideally, gardening organically allows nature to take its course without the use of outside sources. However, in organic gardening, there are a few helpers you’ll need before getting started. I’m not talking about a sturdy trowel or a big strong teenage nephew (although each can be darned handy in the garden). What I’m referring to are some basic products that will help keep your organic garden strong and healthy.

These products fall into four categories: fertilizers, herbicides, fungicides and insecticides. Let’s take them one at a time:

Fertilizers

Put simply, fertilizers enhance the growth of a plant. In organic gardening, fertilizers are used to maintain the proper balance of nutrients in the soil that can be depleted over time due to natural soil erosion, planting and watering.

In organic gardening, the primary fertilizer you need to use is compost. A handful tossed under a plant every few weeks and watered in provides a great nutritious snack for all of your plants, indoors and out.

Compost tea, a liquid made from compost, is also a wonderful additive, either used as a drench or a foliar spray. While there are lots of complicated recipes for brewing manure compost tea, there is a much easier source: Lee Valley Tools sells compost tea bags, called Barnyard Tea and they are wonderful. (See the Referenced Links section at the bottom for their website address.)

Other fertilizers that can be helpful when dealing with certain plants requiring lots of trace minerals include fish emulsion, seaweed, Epsom salts, molasses, earthworm castings, wood ashes, bone or blood meal, and soft rock phosphates.

Organic gardening books are extremely helpful when trying to determine what plants like which minerals.

Herbicides

Inundated with dandelions? Crabby because of crab grass? Among organic gardeners, chemical herbicides are routinely reviled for both their propensity for wiping everything out and frequent false claims of being safe for the soil. So what’s an organic gardener supposed to use on pesky weeds and invasive grasses?

Well, first you should know there are two kinds of herbicides: “selective” and “non-selective”. From the terms, you can probably guess their definitions; “selectives” affect only the plants they’re designed to kill, while “non-selectives” pretty much kill anything they come in contact with.

Believe it or not, the most popular organic herbicide is powerful enough to be designated as “non-selective”. Like its chemical counterparts, it can be dangerous if splashed onto the skin, in the eyes, or if the fumes are breathed.

It also makes great pickles. It is, of course, vinegar.>/p>

For an effective organic herbicide, 10% acetic acid white vinegar (sold at many farm supply stores) sprayed on weeds, especially in the heat of the afternoon, provides effective weed and grass control. But be careful - it’ll kill everything it touches. Don’t spray it on a windy day, keep a safe distance, where long sleeves and pants, and make sure your eyes are covered.

For an even more effective mix, add 1 oz. Orange oil and 1 teaspoon of liquid dish soap to each gallon of 10% vinegar. And the “selective” organic method of ridding unwanted weeds and plants? It’s called hand-pulling.

Fungicides

Even though we encourage natural microorganisms in the soil, sometimes they can go overboard. More specifically, too much moisture invites a parasitic form of fungi to form where it’s not wanted.

As with herbicides and pesticides, there are lots of horror stories that can be told about synthetic fungicides and their negative effect on living organisms, but I’ll spare you the gory details. All you need to know is that converting to natural fungicides is probably the easiest step to make when turning to organics.

One of the most effective organic fungicides is baking soda. Four teaspoons mixed in a gallon of water with 1 tablespoon of horticultural oil and sprayed lightly on foliage of plants treats black spot, powdery mildew, brown patch and other fungal diseases. You really just can’t beat it. The other fungicide I routinely use is horticultural cornmeal. Scratched into the soil around the base of plants, it is a good disease fighter and preventative for future fungus problems, as well as those pesky fungus gnats. Lastly, my orchid-growing friends recommend a cinnamon rub directly onto leaves for stopping black spots in their tracks on their precious phrags and phals.

Many of the big home improvement centers are beginning to sell organic products like 10% vinegar, Bt, horticultural cornmeal, pre-prepared orange oil, garlic spray and Bt. This is really good news for anyone wanting to convert to organics. If you can’t find any of these items in a store near you, Gardens Alive! has a great line of all-organic products available by mail or internet order.

Need a cleanup for your garden, drawing the insects away and have a better and more organic garden? Be sure to check out Portland TT. They have professional experts with years of experience ready to help.

Yard and Garden Planning - Fall Gardening Focuses on Bulbs and Blooms

Yard and Garden Planning - Fall Gardening Focuses on Bulbs and Blooms

Planting Bulbs for Spring Blooms

Small bulbs can yield a spectacular display when you least expect it, even before the snow melts. Plant spring-flowering bulbs now to transform your yard into a colorful carpet.

Crocus are some of the first bulbs to bloom in the spring, and may even show up before the snow has completely melted off the lawn. Chionodoxa, or Glory-of-the-Snow, at right, add subtle hues with delicate pastel-colored flowers. As with grape hyacinths, right, and scilla, Glory-of-the-Snow will multiply naturally, so your spring show may be more spectacular as the years go by.

Planting small flowers in a large area will require lots of bulbs to make a colorful statement. But don't plant them in straight rows or scatter them too far apart. About 6 inches apart in all directions will create a more intense show of color. Plant each bulb about 3 to 4 inches deep, growing tip up, just after it rains or after you have watered the lawn so the soil will be easier to cut into. Using a sharp-tipped trowel will make it even easier to create a small opening in the grass.

Another way to get a naturalized look and a sea of color is to plant small bulbs under deciduous shrubs. Scilla, or Siberian Squill, can be planted in masses to create a bright blue drift under a shrub border early in the season, before the shrubs have leafed out. Scilla bulbs should be placed about 4 inches apart. Over the years, they will spread and fill the area with tiny blue flowers.

Or, try the early risers striped squill, or Puschkinia. The blooms are bluish-white, with a delicate blue stripe running the length of each petal. It, too, will multiply and fill an area with a mass of color. If you have an open border, mass miniature 'Tom Thumb' daffodils and blue scilla. This eye-catching combination is spectacular for a long time.

After flowers fade on spring-blooming bulbs, don't cut the foliage off too soon. Mow the lawn at a height of 3 to 3-1/2 inches so you don't remove much of the bulb foliage. Leave the foliage until it turns yellow and brown; this will help the plants build up food reserves in the bulb for next year's floral display.

The Colorful Chrysanthemum

Chrysanthemums add mounds of color and blend beautifully with the natural colors of fall. But not all mums are suitable for the garden.

Florist's mums add instant color, but their colorful blooms don't last long and will die with the first frost. Garden mums, however, are hardy to Zone 5 and will still bloom after a few light freezes in the fall.

Mums are "short day plants," producing flower buds when the days are shorter than the nights. There are some new varieties, however, that will form flowers under any day length. Check with your local garden center.

Plant mums at least 6 weeks before a killing frost so that their roots have time to become established. Be careful with their stems; they can be quite brittle.

If you want professional help to plant the spring-flowering shrubs, maintaining your garden and more, check out Portland TT for more information.

Dwarf Evergreen Shrubs Enhance Shady North-facing Front Landscapes

Dwarf Evergreen Shrubs Enhance Shady North-facing Front Landscapes

Low-maintenance small evergreen shrubs are first-rate selections for DIY landscape foundation plantings. They enrich the looks of shady front yard landscapes.

Plant breeders continue to introduce shrubs that save maintenance time, effort, and money. These introductions are smaller than their normal-sized relatives and often labeled as dwarfs. They are relatively disease and pest resistant. Both needle-leaf and broad-leaf evergreen varieties offer year-round color interest.

The 19th century tradition of foundation plantings persists in many regions. Problems result when small trees and shrubs overwhelm foundation area spaces. Habitually, shearing plants into contorted shapes is used to maintain optimal sizes. This practice leads to bizarre looking and unhealthy plants.

Plant Suggestions

Below are suggestions for up-to-the-minute low-maintenance dwarf evergreen landscape plants for foundation landscape plantings. These plants are relatively slow growing and require little maintenance over the years. Shearing distorts their natural positive features and requires unnecessary work. Most do not require pruning except for snipping off wayward and winter-killed branches.

Suggestions are for plantings two to three layers deep:

      • small ground-huggers if desired

      • medium fillers, and

      • dynamic background plants.

Ultimate heights of mature plants are lower than most front windows. Because these plants appear small when bought in containers, it is important to space according to mature spread. This avoids overcrowding of mature plants.

Paxistima canbyi - Canby Paxistima - North American Native

      • Size, Habit and Form: 12" tall, spreading to 3' or 4' or more, low, with multiple stems that are fine and flexible;

      • Features: summer foliage is lustrous dark green color with leaves crowded on stems; autumn foliage bronzes a little; flowers in early May, not particularly showy, are small greenish or reddish, held in small clusters;

      • Culture: prefers moist but well-drained soil, likes high soil organic matter content, tolerates high pH soils (alkaline); full sun is best, but does well in partial shade; avoid high fertilization.

Taxus baccata ‘Repandens’ - Spreading English Yew

      • Size, Habit and Form – will reach 2 to 4' high by 10' wide in time but can easily be kept smaller; set plants 3' on center and prune lightly to maintain low growing, softly arching branches; form develops best when English yew has room to spread and is left unpruned;

      • Features - tolerates temperatures as low as -20 degrees F/-28 degrees C; 'Repandens’ is a female clone, so it bears fruit; bark, foliage and fruit can be toxic to children and grazing animals; one of the few conifers that thrives in shade. Generally pest and disease free, but can develop scale (and resulting sooty mold) and black vine weevil;

      • Culture - prefers well-drained soil and is drought tolerant once established.

Daphne odora ‘Aureomarginata’ - Variegated Winter Daphne

      • Size, Habit and Form – grows to 4' high and 5 or 6' across with time; may grow fast in right conditions, however, it often reaches only about two-thirds optimal size;

      • Qualities - small waxy-looking fragrant flowers that emerge from purple buds in March and April; long, narrow leaves edged in creamy gold;

      • Culture – likes fertile, humus-rich, well-drained soil in part shade, foliage burns in hot afternoon sun, drought tolerant once established; mulch in March, add a handful of all-purpose organic fertilizer to keep foliage a rich green, prune lightly in summer to encourage dense growth.

Sarcococca hookeriana var humilis (sometimes just S. humilis) – Dwarf Sweetbox (or Sweetbox)

      • Size, Habit and Form – 1 to 2' high in time if never sheared; spreads slowly over area to 3' wide;

      • Qualities - tiny creamy-white tubular fragrant flowers begin in February and continue throughout late winter; male and female flowers on same bush are followed by purple-black berries that add ornamental value;

      • Culture – likes organically rich soil, tolerates a bit of drought after regular watering its first year; may be sheared each spring for increased compactness.

Skimmia japonica - Japanese Skimmia

      • Size, Habit and Form – 3 to 4' high, 3 to 4' wide; growth rate is slow; medium texture appearance, dense rounded mound, foliage is medium green crowded at end of 2.5 to 5" long stem;

      • Qualities – creamy white flowers with mild fragrance emerge from glossy red-maroon buds, showy red fruit follow on female plants;Culture - Partial shade to shade; prefers moist, well-drained soil enriched with organic matter.

Leucothoe axillaris - North American Native

      • Size, Habit and Form – 3 to 6' high, 3 to 6' spread, showy red-tipped new foliage;

      • Qualities – white flowers in pendant clusters in early summer;

      • Culture - part shade to full shade, medium moisture.

Leucothoe fontanesiana

      • Size, Habit and Form - slightly larger in form than above, however, characteristics similar;

      • Several cultivars available:

          1. 'Girard's Rainbow' - foliage emerges white, pink and coppery on this selection, maturing to green streaked with cream; less vigorous than the species, but handsome;

          2. 'Mary Elizabeth' - dwarf form with finely-textured, narrow foliage that bronzes in winter.

          3. 'Nana' (perhaps the same as 'Compacta') - a dense, dwarf form reaching 2' tall and wider;

          4. 'Scarletta' – easy to find in commerce, notable for its deep red new growth and bronzy-purple winter hue;

          5. 'Silver Run' - variegated form that appears to be hardier than 'Girard's Rainbow', offers foliage marked with creamy white area.

If you need help maintaining your garden or cutting trees by a team of professional experts with years of experience, check out Portland TT.

Compost = home grown fertility

Compost = home grown fertility

Organic gardeners avoid using modern synthetic fertilisers, and rely primarily on organic matter to feed their plants. Fresh organic matter has to be processed or 'composted' in some form to release the plant nutrients it contains.

Even though composting depicts decay of once living materials into constituent ingredients, it is useful to think of compost as a living organism, at least whilst it is being made. It will give you an insight as to how composting is best controlled and the processing time minimised.

Aims of good compost making

The idea of composting often brings up visions of ‘muck and magic’, but the aim of good composting is, in a few months, to produce a rich soil-like material full of plant nutrients.

Well-matured compost is not unpleasant to handle, and has a soft, pleasant earthy smell.

Needs

Think of 'working' compost as a living organism and its needs are the same as your own:

      • somewhere to live - with shelter from wind and rain

      • warmth

      • air - primarily oxygen

      • water - too little and we die, too much and we drown or are at least cold & miserable

      • an energy source - carbohydrate

      • a protein (nitrogen) source

      • other minerals in varying quantities

Does this list look familiar?

Ingredients

The secret behind successful composting is to use the right mix of materials and provide a suitable environment for the composting microbes to live in. Warmth, moisture and air are all very important.

The correct mix of raw materials is one in which 'greens' are mixed with more fibrous ‘browns’ at the rate of four parts (by volume) of ‘greens’ to one of ‘browns’. Too many greens, especially grass clippings can lead to a smelly, slimy mess which will take a year to compost.

Beware - do not put cooked food scraps or meat or cat and dog faeces into the compost heap. They will compost but they may attract vermin (eg rats) or possibly lead to a risk of disease.

Other pet manures such as from rabbits, hamsters, guinea pigs, gerbils are excellent compost materials, but not cat and dog faeces.

If you intend to use large quantities of grass clippings for compost, then make sure they are well mixed with 'brown' materials such as straw, and that the heap is turned regularly.

Unless you can be sure of a hot composting process it is better not to put the roots of perennial weeds such as couch grass (scutch) into a compost bin.

Newspaper and cardboard can be composted in small quantities as long as they are well mixed with 'greens'.

Compost activators and additives

A small amount of soil mixed into the heap will add soil microbes and contribute to the composting. Mature compost or well-rotted manure also acts as an activator by 'seeding' the new heap with the right microbes.

A sprinkling of lime mixed in will help to keep the heap 'sweet' by stopping the heap getting too acidic. High acidity slows down the composting process.

Seaweed is an excellent compost ingredient, mainly contributing trace elements and minerals.

Not for the squeamish - urine is a good compost activator and a lot cheaper than buying compost activators from the garden centre. It contains nitrogen.

Activators are added to compost bins to 'activate' the compost and get it going quickly. They are normally materials rich in nitrogen such as comfrey leaves, grass clippings, poultry manure, urine, young weeds, nettle tops.

Composting process

Once composting starts, the temperature in the bin rises very rapidly to 60-70°C. Turn the mixture with a fork after about two weeks to get more air into the material and keep the heating going.

It is this heating process which kills weed seeds, disease organisms and perennial weeds.

It might need turning again a few weeks later. It will then slowly cool down, and as it does so the materials will become progressively unrecognisable for what they originally were. As the compost finally matures, manure worms and other creatures will move into the compost.

Once the compost looks, feels and smells like soil it is ready to use. Generally speaking, the longer the temperature stays high, the shorter time will be needed for composting to reach completion.

Making the compost

BIG IS BEAUTIFUL

The bigger the volume you can start composting at one go the easier and quicker the process will be. Collect ‘browns’ in advance and then mix with the ‘greens’ to fill the compost bin. Add water if required so that the mixture is like a damp sponge, and cover.

Alternatively, though the overall process will be slower, layer ‘greens’ and ‘browns’ as they become available.

Shredding is useful for woody materials (browns) as the microbes have a bigger surface area to work on. It also allows you to compost tougher materials than you might normally do.

Compost containers

What about a compost bin? For small gardens you can buy nice plastic or wooden bins, but a cheaper alternative is a plastic dustbin. Drill holes around the bottom to let air in. For large gardens which produce a lot of compostable material, sheep wire around four fencing posts in a square, and lined inside with polythene or cardboard, makes a cheap, though not particularly attractive, bin. Whichever type you use put a six-inch layer of sticks at the bottom to help provide aeration.

Good insulation and some form of roof or cover will keep the heat in and the water out. A range of commercial compost bins are available. Some of them may be difficult to use due to their small size - ie they don't hold enough material to heat up properly. They can be quite expensive, though they can be more attractive than some home-made bins.

Compost tumblers may also suffer from small volume problems, though they do give good aeration of the composting material. Very large tumblers will be heavy to turn.

Wooden bins can be home-made to a suitable size and can incorporate ventilation holes. These should not be so large that they let too much heat out as they let air in. A slatted removable front makes removal of the finished compost easy.

A large compost bin can be made from old, but sound, wooden pallets. They may need to have the large gaps between planks filled with planks from other pallets to prevent heat loss. The resulting double wall gives good insulation.

Compost bins made of mortared building bricks or blocks are obviously more permanent. They have good insulation properties.

Straw bales can be made into a temporary compost bin - temporary in that it will last one year before rotting. It can then itself be mixed with fresh material in another bin - a compostable compost bin! The bales are laid in a square or rectangle arranged like brickwork, and then covered with a polythene cover.

Siting

Depending on the construction, a compost bin may not be the most attractive of garden features. Generally, site it well away from the house since at times it may give off its own distinctive smell!

Using compost

Garden compost can be used in the same way as well rotted farm yard manure as a basic nutrient and organic matter provider. Compost also makes a top class feeding mulch for all plants.

If you have only small quantities then it is probably best used for making your own organic seed or potting mixture.

Nutrient content of compost

Well-made garden compost has a similar nutrient composition to well rotted farm yard manure.

Anaerobic composting

The normal idea of composting is a process which heats up, requiring air for the microbes. However, compost can be made in the relative absence of air, though it will take up to a year to complete, and the material will often be wet and heavy. It may often have a 'sour' smell at times.

In anaerobic composting a different set of microbes break the fresh material down, at a much slower rate. This often happens naturally when a large mass of grass clippings put into the compost bin heat up for a short while but then compress down sealing the air out of the material. You may also find layers of grass which are yellow-green and have not broken down at all. When this happens you have preserved the grass by making a layer of silage. Breaking this up and letting the air in will start composting.

It is good policy to turn an anaerobic heap in mid-late winter to get air in and complete the composting. Beware - it is very heavy to turn when wet. After turning it keeps rain out to allow it to dry out before use.

Sheet composting

Fresh organic materials can be put into layers on the surface of the soil over the winter. You might cover it with polythene.

The material will break down slowly, but nutrients may be washed out, and it may also attract vermin. Slugs may also breed underneath it and birds may spread it all over the place.

Trench composting

Trench composting is an old technique in which a trench is progressively filled with material for composting and covered with soil as the trench is filled. It can be useful for preparing a high organic matter site for hungry crops such as runner beans.

Disease free semi-hard materials such as Brussels Sprout stumps can be put in the bottom where they will break down over a couple of years.

Worm composting

Worm composting uses brandling or 'manure' worms to break down normally smallish quantities of kitchen waste in a specially prepared 'worm bin'.

It can be done on a large scale, but requires large quantities of the correct mix of materials and a suitable covered site.

The compost (worm casts) from the process make excellent solid plant feed or a nutrient source for seed or potting mixtures, and the drainage liquid makes good liquid feed.

Leaf mould

Leaves break down slowly into a nutrient-poor leaf mould. Well broken down and sieved, it makes a good peat substitute in seed composts. A suitable bin can be made from four posts and wire netting. No insulation is needed, but a cover is needed to prevent the leaves blowing away.

Note: a lot of leaves make only a little leaf mould.

Hot beds

Victorian gardeners used hot beds for growing early crops, either outside or in a greenhouse.

In essence a hot bed is a large stack of fresh, strawy horse or farmyard manure which is layered with and covered with soil. A cold frame is placed on top for growing the crops in.

As the manure composts it gives off heat which keeps the frame on top warm. It also provides nutrients for the growing crops.

The hot bed will slowly shrink and sink as it matures, and once cropping has finished the resulting 'compost' can be used like normal compost.

It’s a long process, so if you need some help for maintaining your garden, hire a professional company like Portland TT.

Vegetable Garden - Prepare for Bulb Planting

Vegetable Garden - Prepare for Bulb Planting

While most gardeners are busy preparing to plant flower bulbs at this time of the year, don’t forget that it’s bulb planting time in the vegetable garden too. Garlic, potato onions, and “walking” onions can all be planted at the same time your tulips and daffodils go in. Like flower bulbs, garlic & onion bulbs need to be planted in soil that is well amended and prepared.

What are these bulbs?

Most of us have heard of garlic but if you’ve only ever tasted garlic from the supermarket, you’re in for a real treat growing your own. First, you’ll soon realize that there are dozens of varieties of garlic ranging from hot & spicy Rocambole types to the giant, mildly flavoured elephant garlic. Rocambole types do especially well when fall planted, giving them enough time to develop that flavourful zing.

A bit more unusual, potato onions are thought to have been a staple for pioneers on their journey westward. More like shallots, these onions will multiply below ground from a single bulb. A papery covering envelops the entire bulb cluster. Both the bulbs and the greens are edible and are usually ready to harvest before regular onions and store very well. One potato onion will usually multiply to 8 in one season. No wonder they were once so prized that they were given away as wedding presents! Yellow potato onions are probably the easiest variety to grow if you want to just try them. For the more daring, potato onions come in white & red.

Lastly, “walking” or “topsetting” onions work well both in the vegetable or ornamental garden. Instead of forming below ground, these plants set bulbils at the top of their stems. As the bulbils fatten up, their weight causes the stems to bend over. Once they come into contact with soil, the bulbils will sprout. Thus, you get onions “walking” around your garden. Varieties include Egyptian and Catawissa.

Where to plant?

Instead of tucking these bulbs into spots under trees or in pots like you would flower bulbs, garlic and onion bulbs need to be planted in full sun & fairly rich soil. Even though they will grow in partly shady areas, the size of your harvest will indeed by affected if they’re given less than optimum conditions.

If you’re planning to actively harvest bulbs for food, you’ll want to ensure that you provide a balance of nutrients for the long growing season. The application of compost, well-aged manure, and bonemeal or rock phosphate will provide a source of slow-release nutrients. Fertilizers too high in nitrogen, especially, are to be avoided so that frost tender-foliage isn’t stimulated to develop. Also, if you live in an area that gets a large amount of rain during the winter the nutrients in slow-release fertilizers are less likely to leach away.

Drainage is also an important factor when deciding where to plant your vegetable bulbs. Any water sitting through the winter will cause your onion & garlic bulbs to rot. Choose a well-drained site or else mound your soil if you don’t have raised beds.

Bonemeal – pros & cons

Bonemeal is a by-product of the cattle industry and is an organic source of slow-release phosphorus– a nutrient that’s especially important for root & bulb formation. However, there are fears from the UK that bonemeal may transmit the prion that causes the human form of Mad Cow Disease. Because it is so dusty, the meal can easily be inhaled which is a possible route of infection. While there haven’t been any reports of Mad Cow Disease in the UK, bonemeal itself is a commodity sold on the world market. The bonemeal sold here in Canada, for instance, may not have come from cattle raised here. The other organic alternative to bonemeal is rock phosphate, a mineral-based product.

If you do decide to use bonemeal, do wear a dust mask or cloth over your mouth and nose to prevent inhalation.

If you need help in regular maintenance of your vegetable garden, don’t hesitate to contact Portland TT.

Panicled Hydrangea – Small Trees and Shrubs in the Modern Landscape

Panicled Hydrangea – Small Trees and Shrubs in the Modern Landscape

The old-fashioned panicled hydrangea (Hydrangea paniculata 'Grandiflora'), a traditional feature of Northeast American garden landscapes, makes a comeback in new forms.

Introduction of new panicled hydrangea varieties also launches new garden forms that command nontraditional uses. Landscape gardeners can find varieties (cultivars) to suit almost any landscaping need from container plantings to shrub borders to focal or accent groupings. Many introductions within the last few decades are from Jelena and Robert deBelder's Kalmthout Arboretum, Belgium and plant breeders in the Netherlands.

Hydrangea paniculata 'Grandiflora,' introduced to western garden landscapes in the mid-19th century from eastern Asia, is one of seven Hydrangea species suitable and adaptable to North America. Until recently, most nurseries sold only the tree form of 'Grandiflora' nicknamed PeeGee, probably named from paniculata 'Grandiflora' or P. G.

Old New England cemeteries and traditional landscapes provide numbers of solitary and neglected PeeGee hydrangeas. They produce pyramidal-shaped flower panicles – 6 to 8-inches long and wider at the base than tip – that are prized autumn features. The florets, most fertile and not showy but with a lesser amount sterile and showy, change color from yellow-white to pink as they mature. Dried panicles of these pink florets brighten many autumn flower arrangements.

Characteristics of Hydrangea paniculata

      • Cold hardy from plant growing zones 3 to 8;

      • Set buds and bloom on current year's wood;

      • Bloom from mid-July to September or later;

      • Color not dependent upon soil acidity;

      • Full sun plant, but will grow and bloom in partial shade;

      • Thrives in rich, porous moist and well-drained soil; however

      • Adaptable, and tolerant of urban conditions – difficult to destroy.

Selected Cultivars

A tally of online and print sources shows upward of 24 panicled hydrangea cultivars. Regional and local retail nurseries are slowly purchasing and featuring the most unusual of these cultivars.

Landscape gardeners who want to introduce new form and color into late summer and autumn landscapes should survey which panicled hydrangea cultivars are available to them. The next step is deciding exactly how to use the cultivars. Below are three cultivars that demonstrate a variety of uses in the modern landscape:

      • 'Quick Fire' begins to bloom in the mid-Atlantic states from late June to early July. Blooms change from white to a rich pink-red. Autumn leaf color is green with a tinge of yellow, sometimes a red-purple. Mature size is 6-to-8 feet tall, 3-to-5 feet wide. This cultivar serves a variety of uses: specimens or massed as accents, perennial or shrub borders, screens or hedges, mixed container plantings.

      • 'Limelight' flowers in mid-summer with chartreuse or yellow-white florets that become pink to burgundy with cool autumn temperatures. Summer and autumn leaf color is light green with some reports of red autumn foliage. Mature size is 6-to-8 feet tall, but spreads 5-to-7 feet wide. This cultivar, like 'Quick Fire,' also serves a variety of uses. However, rigorous pruning of 'Limelight' is necessary to keep it contained in small landscape displays.

      • 'Pinky Winky,' newly introduced to landscapes in 2008, produces 12- to-16 inch long flower panicles on strong red stems. The upright stems prevent the drooping panicles seen on the Pee Gee hydrangea. New florets emerge white while the older ones turn dark pink. The result is a panicle of two-toned florets. Panicles bloom and grow until frost. 'Pinky Winky' matures to 8 feet tall and equally as wide This cultivar is best used as specimens or massed as accents, perennial or shrub borders, screens or hedges.

If you’re planning to renovate and decorate your garden, planting trees and clearing lots, be sure to check out Portland TT to know more about their professional services and staff.

The Right Bonsaï To Begin With

The Right Bonsaï To Begin With

As a bonsai beginner, you might be tempted to choose a bonsai that is already formed, but this is a huge mistake!

There are two main ways to start growing bonsai: buying an already-formed tree from a nursery, or making one yourself from a local tree.

Buying an Already-formed Bonsai

Already-formed bonsai trees can be found in supermarkets or non-specialized nurseries. You might find them being sold under the name “indoor bonsai”. They tend to be inexpensive: typically, these bonsai will cost you anywhere from $8 to $35.

Buying an already-formed bonsai will allow you to get started quickly and easily. Unfortunately, these bonsai tend to be fragile, and don’t last for very long. These bonsai are usually grown in industrial quantities in Asia, which means the trees are not adapted to our climate. The industrial scale also means that their quality, and the care given to them, is diminished compared to bonsai grown by passionate growers.

Making Your Own Bonsai

Creating your own bonsai is slightly more challenging than buying one from a store. But it can be more fulfilling, and your bonsai will be more likely to last.

Here are some tips to get started:

Tip 1: Choose a Tree That Grows Locally

You want a tree that is well-acclimated to your area. As such, it’s a good idea to work with a tree that grows locally, so you know it’s suited to your area. The good news is that almost any tree can be cultivated into a bonsai.

To give your bonsai the best chance of survival, choose a rustic tree.

Tip 2: Pay Attention to the the Leaves

To produce a beautiful bonsai, you will want to take into consideration the type of leaves your chosen tree produces. For example, small, dense foliage can give a sense of balance and simplicity to your bonsai tree.

Tip 3: Start With a Large Pot

It’s a good idea to start growing your bonsai in a large pot. You can reduce the size later on as you cut and replant your tree.

Tip 4: Be Patient

It’s normal to be frustrated in the beginning. You might feel that your creation doesn’t look like a real bonsai. But don’t fret! Think of your bonsai as a living sculpture. It can take several years before it grows into the shape you want. As the tree grows, you can alter its height and the direction of its growth. You can even change the size of the leaves.

Conclusion

Small trees like bonsai are wonderful and fun to tend to, but large trees need some love too! Contact Portland Tree Trimming Services to learn more about what you can do for your trees.

Why Do Leaves Fall In Autumn

Why Do Leaves Fall In Autumn

Why do leaves fall in the Fall? And why do conifers never lose their leaves?

A Look at the Science

During the Fall, trees lose their leaves in order to ensure their survival. By losing their leaves, trees are able to protect themselves from cold winter temperatures.

But how does this mechanism work?

In order to survive the cold, trees must slow down their growth. The trunk, branches, and roots are well isolated from the cold. The problem lies with the leaves, which consume a lot of energy in order to resist the cold. Instead of expending that energy, trees have evolved to simply drop their leaves before the winter. This helps keep the tree alive through the winter months.

Everything which uses up energy is therefore sacrificed. Leaves, on the other hand, consume enormous amounts of energy in an effort to resist the cold. To save energy, these sources of energy waste are therefore eliminated by the tree.

What Triggers the Leaves To Fall?

Tree leaves have sensors that alert the tree when the weather starts to become colder. This process is usually marked by an increase in the production of ethylene.

When the tree senses that winter is coming, it begins to cut off the supply of sap to the leaves by secreting small corks that appear in the leaves’ peduncles. This, in turn, cuts off the leaves’ supply of water and mineral salts, rendering the leaves unable to photosynthesise. This is the process behind why leaves change color to red and orange in the Fall.

Over time, the leaves will grow weak, dry out, and fall. The process does not hurt the tree. Any scars left by the leaves are quickly filled in by cork secretions.

This process allows the tree to concentrate its sap in its vital organs, increasing the likelihood of survival through the winter.

Why Do Conifer Trees Never Lose Their Leaves?

Conifer trees don’t lose their leaves in the Fall because they don’t have to. Their leaves are coated in a layer of insulating wax. This makes their leaves stronger and more resilient compared to those of other trees. Many conifer trees also produce substances that help further protect them from the cold. Since these processes happen naturally, it does not take up any energy from the tree.

Conclusion

If you want to take care of your tree throughout the seasons, visit Portland Tree Trimming Services.

Landscape Garden Color

Landscape Garden Color

Planned Design Generates Unified Appearance

Landscape gardens with coordinated color present unified appearances and pleasing public images. Using color in the garden landscape calls for basic guiding principles.

Overview

Planned design and placement of plants within a landscape garden presents a unified appearance and public image. Four-season or year-round landscape color is easy to achieve. Success, however, emerges slowly over time. Patience is necessary.

Successful use of color in the garden landscape calls for a few guiding principles. Following these basic guidelines, while not being a slave to them, leads to a feeling and look of accomplishment. Continuing success with landscape color requires frequently checking these guidelines so the process stays trouble-free.

Using Color

Choose plants that offer more than one season of color. Catalogs from reputable nurseries usually incorporate charts detailing distinctive characteristics of their plants. Unfortunately, landscape gardeners often choose plants for only one season of spectacular leaf color or flowers, or ease of maintenance.

Capture color from well thought-out plant choices to complement and harmonize with buildings, existing vegetation, and landscape garden sites. The white color of a traditional New England home and flaming red maple leaves work well together and create a simple but eye-catching front yard landscape. The same tree planted in a similar position adjacent to a red brick colonial home is either lost because the colors blend, or they unattractively conflict.

Decide on a scheme with two or three primary colors and stick to it. It is difficult to find plants and their parts in pure primary colors, but tones and tints and their hues and shades abound. Schemes incorporating a wide range of primary colors and their subtle variations are usually enjoyable and pleasing not only to the landscape gardener, but also to the household, visitors and casual passersby. It is also possible using meticulous deliberation to plan restful and dainty landscapes in pastel colors, as well as fanciful and playful landscapes in bright forceful and dynamic ones.

How to Begin

Purchase or download from the Internet an inexpensive color wheel (color circle). A color wheel, based on red, yellow and blue, is a time-honored tool for artists. It is also a valuable as well as enjoyable tool for landscape gardeners to own and use. The color wheel demonstrates in an uncomplicated manner an understandable arrangement of fundamental colors. Colors and their arrangement and relation to each other will emerge as consistent and logical parts of landscape gardeners’ worlds by exploring and using the color wheel.

The Primary Colors

Primary colors are red, yellow, and blue. In this group are the hottest-feeling, colors red and yellow, and the coolest color, blue.

For most people, just thinking about these red and yellow colors together brings sensations of blazing sunshine and intense scorching. Red and yellow used together also equal excitement or when muted, autumn. The south-facing Cottage Garden at Sissinghurst Castle Garden (Kent, England) is a good example of an abundance of hot colors. However, many people feel uncomfortable in this garden for that reason.

Red and yellow can also be used singly or together to:

      • focus attention on an attractive garden feature,

      • divert attention from an unattractive feature, or

      • convey a mood or feeling.

Bright red doors draw attention to the entrance in an emphatic, but attractive way. They indicate clearly, "This is the way inside." Ripe red apples stop viewers' eyes and attract admiration. Because the apples draw attention, there is little, if any, attention paid to what might lurk behind the apple tree.

Yellow used by itself usually means caution, concern or most often, cheerfulness. The first yellow spring daffodils and forsythia suggest the warmth and happiness of springtime. Few passersby can avoid feeling cheerful and encouraged when seeing a planting of sunflowers.

Blue is a cool, or even cold, color. In the garden landscape plants of this color pass on feelings of calmness and restfulness. Blue with silver and white usually implies cleanliness, purity, and precision.

The easiest way to use blue in the garden landscape is by using plants with subtly variegated blue-white or blue-silver leaves and needles. Deep shades of blue, often found on autumn flowers, recede at dusk, and often we see a hole where a plant really grows. However, some designers advocate using blue to create a sense of distance.

Once you’ve established the colors you want to use for your garden, it’s time to add the most important color in nature - green! Get started by hiring professional tree planting services to beautify your garden with a variety of trees.

Houseplant Basics: Soil 101

Soil for Houseplant

Your potting soil can make the difference in the health of your plant. When you opt to have houseplants in your home you want to have the best quality potting soil. Your potting soil should offer the ideal balance of oxygen and water. This nutritional balance is very important for the soil to retain water between waterings while allowing for proper drainage.

You should never reuse potting soil from a previous houseplant that died because of pests or disease. In such a case, the soil may be diseased or otherwise contaminated. If your previous houseplant died because you made the soil dry out too many times, you still shouldn’t reuse it. This soil will have only a few pore spaces. These pore spaces are pockets that hold water to sustain a plant. As soil decomposes, it loses pore space which results in a denser soil which is harder for air to go through. This prevents roots from growing properly.

Although we don’t recommend reusing the soil, you can reuse the pots. Before reusing them, scrub them clean and allow them to soak in a solution of 10% bleach and water.

Potting Mix versus Soil Mix - What’s the Difference?

Potting Mix

Most people described anything used to pot plants as “soil” but in all actuality, most of the substances used for potting plants are not soil. These mixes are completely free of traditional garden soil. It will look like soil and even smell like it but it is not.

Most potting soils contain at least one of the following:

Soil mixes on the other hand will have a blend of soil. When purchasing potting mix or soil mix, make sure to read the package and choose a high-quality option. We recommend a high-quality soil-less potting mix for your houseplants.

Speciality Potting Mixes

Some house plants will require a special potting mix. You can expect this from plans like African Violets, Cacti, and Orchids. They are very popular houseplants and so your local garden store should have special commercial blends specifically designed for these plants.

African Violet Mixes

These flowers like light, loose and porous soil. So most of these mixes will contain one part perlite, two parts vermiculite, and three parts peat moss. Lime is often added to the mix to bring the pH into the 5.8 to 6.0 range. These plants do not like when their roots are sitting in water so it is important for their mixture to be porous and loose.

Cacti Mixes

No matter how little you know about plants, we are certain you know that cacti like dry soil. So there should be no surprise that the standard medium for cacti is made of potting mix, perlite, pat, and coarse sand. You will find variations in this formula from one commercial mix to the next but the main aim of these mixes is to ensure the best drainage.

Orchid Mixes

Orchid mixes may look like they won’t be able to sustain a plant but they are designed specifically for orchids and are the best option for a healthy and beautiful orchid. They will contain two to three different types of bark along with fine-grade pumice, coarse sphagnum and sponge rock. It may seem like an odd combination but all its ingredients serve their purpose.

You will see some species of orchids growing on a tree in their natural habitat. These orchids are known as epiphytic plants meaning their roots are exposed to the air. So orchid mixes typically have bark and moss so that air can flow more freely throughout the medium. This allows an orchid to absorb the necessary moisture and nutrients from the air.

For more planting tips or to get your answers professionally answered, contact us. We have certified plant care professionals available for both residential and commercial tasks including tree removal, tree care services, landscape planning and maintenance and much more.

Advantage of Container versus Backyard Gardening

Advantage of Container versus Backyard Gardening

Container Gardening VS Backyard Gardening

It may seem like a daunting task to grow your herbs and vegetables but it doesn’t have to be. Just start off by deciding where you want to plant. You can do that in your backyard by reserving a small plot or you can opt to create your very own container garden. Whichever you choose, with a little professional help and guidance you can have a successful garden.

We can all agree, fresh fruits, vegetables and herbs are delicious. If you want the freshest of them you have to reap it yourself. This is where gardening comes in. Worried you don’t have a green thumb? While some garden work can be demanding you can do gardening that is manageable and enjoyable. You just have to keep it simple. So which should you choose? A container garden or backyard gardening? Let us break down each so you can make an informed choice.

Container Gardens

Container gardens are ideal for anyone who lives in a condo or apartment. These dwellers typically have a patio but no yard space. Container gardens give you the opportunity to garden anywhere. But they do require a little different care.

Choosing Containers

Use containers that are large but practical for the space and for the plants you choose. Smaller pots will require more maintenance as they will dry out quickly. As such they will stress plants easier with extreme moisture level shifts.

Pots that are better at retaining moisture include glazed ceramic pots and plastic. Terra Cotta containers are more porous and so they don’t do a good job at retaining moisture. If you choose a porous container be aware that you will need to water its contents more.

Convenience

Even if you do have space in your backyard for a garden you can still choose to plant in containers instead of in the ground. This allows you to easily access your plants and you won’t have to worry about weeds overgrowing your prized plants.

You can even invest in self-watering pots. These have a special reservoir that provides the plant with regular moisture over a long period of time. These are a better option than your conventional pots.

Planting Herbs

Planting herbs is a very good reason to choose a container garden. You can even start small by having an herb garden in your kitchen. This is convenient as it is going to be close to your cooking area. Even with a small tabletop garden you can have enough fresh herbs to last you a whole year.

Herbs are usually tough as they are drought resistant. They actually get more fragrant and potent when they are exposed to drought conditions.

Backyard Gardening

Planting in a garden plot has its own set of pros and cons. A garden in the backyard will be prone to more weeds and you will need to till and enrich the soil. You may even have the added task of protecting your garden from the local critters. A patio garden will dry out more quickly than a garden that is planted directly into the ground. Here are some tips to get your backyard garden thriving.

Mulch and More Mulch

When you are growing plants in the ground you need to lay down a thick layer of mulch. This will protect your plants from extreme moisture level changes that you can find in container gardens. Adding a significant amount of mulch will help reduce the amount of time you spend weeding your garden as well. On the topic of weeding, the use of garden fabric can also stop the growth of weed.

Beginner Size

When just starting out as a gardener you want to start with a smaller plot. Start off with just a few plants as well and if it goes well you can increase the size next season.

Choosing Plant Varieties

Start off with fewer plant varieties. Choose your favorite vegetables or what will grow in your climate. You may be tempted to try to grow a little of everything but this may give you more work and later provide less yield.

For example, creating a small garden plot that is around 6x6 is a good size for planting a row of leaf lettuce and some indeterminate growth tomato plants. With just four tomato plants you can have enough fresh and preserved tomatoes for an entire year. One row of leaf lettuce can be harvested multiple times to provide you with salads for most of the year as long as the weather permits.

Regardless of the type of garden that you choose you want to ensure the area gets adequate sun. Herbs and vegetables will not do well in shady locations so find a nice and sunny spot. For regular maintenance or to expand your garden or treat your landscape you can reach out to us. We are just a phone call or email away. Get your free estimate today.

Choosing a Houseplant

Treat Insect Problems In Roses

With the right care and attention, roses can provide you with beauty for many years. But even with the best care your roses may sometimes fall prey to pests and diseases they cause. Oftentimes there is something that goes wrong causing your plants to become attractive to pests. It could be a lack of nutrition, a lack of water, inadequate drainage or poor soil conditions. These issues can encourage pests and diseases to take over your roses.

You will find that roses can either be affected by living pathogens as well as by environmental conditions. When the damage to your roses is uniform it most likely is a cultural or environmental problem. But if you see damage that is not uniform then chances are your problem is a living pathogen.

Assessing Symptoms and Causes

  1. Symptom - Small insects on leaves and buds Cause - Aphids. These are usually black, red or green bugs approximately ⅛” long. They are often found in clusters and mainly seen on new growth. They tend to appear in spring and can stick around until summer.

    Treatment - Start off by hosing off the plant with water. This will remove the insects. If they keep coming back you can try a mixture of water and dish soap to spray the bugs. The next step in treatment would be to find an effective commercial insecticidal spray. You can also look out for aerosol insecticides that are specifically for killing aphids. You can find all you need from your local garden center.

  2. Symptom - Distorted buds and discolored bloom tips. Cause - Thrips. These are small light brown insects that are ⅛” long. They tend to appear inside petals and are spread by the wind. They move quickly so you have to stop them in their tracks fast!

    Treatment - Look for a systemic insecticide that targets Thrips specifically. Apply this with your new growth when it grows to 1” or more in the spring. You can rotate your treatments when your rose buds are still pea sized.

  3. Symptom - Stuck together leaves and holes in unopened buds. Cause - The omnivorous leaf roller. This is a moth larva that makes a cocoon with rose plant leaves.

    Treatment - Remove all the cocoons from the rose plant. You can further treat leaves with a systemic insecticide that targets these leaf rollers. Apply to plants when new growth is 1” or more in the spring. You can use contact treatments on a rotational basis.

  4. Symptom - Yellow and fuzzy leaf surface with small red specks, webbing and spider like insects on the underside.

    Cause - The Spidermite. These are microscopic but you can still see them with the naked eye. They tend to thrive in hot weather.

    Treatment - There’s quite a number of treatments for these. Use horticultural oils, insecticidal soap, a high pressure hose with water or miticides. Apply treatment to the undersides of leaves. In hot weather, keep your plants adequately watered and don’t allow dust to sit on the leaves.

For more tips on treating pests in gardens and landscapes, visit our website. We have certified arborists along with tree and plant care specialists on staff to help you take care of the plants in your surroundings. We cater to both residential and commercial clientele and would love to help you maintain your plants and landscape.

Planting a New Lawn From Seed The Right Way

Planting Seed On A New Lawn

So your decision is made to save some money and plant your new lawn from seed. This route may take a little longer, but it gives a better degree of control in what will be going on in your lawn for the next couple of months. Unlike when you sod, seeding gives you a chance to remediate a problem area in your soil without having to remove a dead patch of sod. The best time to plant your new seed is in the late summer or early fall. This type of climate with warm days, cold nights, and increased rainfall, provides an ideal environment to germinate your new turf seeds.

Another benefit of this timing is that most weeds will have stopped germinating by this point and will not compete with your new seeds for nutrients and water. If late summer or early fall are not an option then the next best time to plant would be early spring. One thing to note here is that if you do plant in the early spring your planting steps will be a little different. For more info on early spring planting consult a local nursery or gardening center for specific info on you region.

Seed selection is another area you can benefit from your local experts. Do to advances in recent years in agriculture, your choices for grass have increased dramatically. No longer do you have to settle for a strain that you don’t want because it isn’t “right” for your climate. To get even more foolproof results you can go with seed mixtures. Seed mixtures will give you the best results because you will get a variety of various species that are selected for a specific trait. These mixtures will provide you with your best chance for a successful lawn if your yard has a combination of different types of soil (ex. Wet, dry, sunny, or shady).

Now it’s time to get dirty. Before you can begin planting your seed you need to make sure your soil is prepared and up to par. To find out more on this go to. I cannot stress this point enough, final soil prep, seeding, and insuring your seed is planted at the proper depth is absolutely critical. The soil should be raked free of all unwanted debris. Large stones or clumps of soil will prevent good root propagation in the area so make sure you remove undesirable material. Large stones may also become a safety hazard upon your first few times mowing your new law so take extra care in this area.

Next step is to spread your seed. Whatever the recommended seed count (per square inch) is, divide that in half and set your spreader up for that seed count. Once you have your spreader all set up, going in one direction only, completely cover the area where you want to have your lawn. With that done, prepare to do a second pass but this time make your pass perpendicular to your initial pass. This method will give you your best coverage. Now that your seed is down you need to rake your seed to approximately a quarter inch in depth and then use a water roller that is only a quarter full to lightly pack that soil down on the seeds.

Now all that is left is for you to ensure your soil stays moist. The top two inches must stay moist until your seeds have good root development. Some slight drying on the surface is fine but should be kept to a minimum. To aid in moisture retention you can use multiple light waterings and straw mulch that stays moist and prevents moisture evaporation. If straw is used spread it out so you can see about a third of the soil through it.

You may also consider using a herbicide for weed control. Make sure to use a product that is labelled for Newly Seeded Lawns. If you do not feel comfortable working with chemicals there are numerous professional pesticide applicators for hire in the phone book.

Click here for more tips about how to plant in your garden.

Planting a New Lawn From Seed The Right Way

Planting a New Lawn From Seed The Right Way

So your decision is made to save some money and plant your new lawn from seed. This route may take a little longer, but it gives a better degree of control in what will be going on in your lawn for the next couple of months. Unlike when you sod, seeding gives you a chance to remediate a problem area in your soil without having to remove a dead patch of sod. The best time to plant your new seed is in the late summer or early fall. This type of climate with warm days, cold nights, and increased rainfall, provides an ideal environment to germinate your new turf seeds. Another benefit of this timing is that most weeds will have stopped germinating by this point and will not compete with your new seeds for nutrients and water. If late summer or early fall are not an option then the next best time to plant would be early spring. One thing to note here is that if you do plant in the early spring your planting steps will be a little different. For more info on early spring planting consult a local nursery or gardening center for specific info on you region.

Seed selection is another area you can benefit from your local experts. Do to advances in recent years in agriculture, your choices for grass have increased dramatically. No longer do you have to settle for a strain that you don’t want because it isn’t “right” for your climate. To get even more foolproof results you can go with seed mixtures. Seed mixtures will give you the best results because you will get a variety of various species that are selected for a specific trait. These mixtures will provide you with your best chance for a successful lawn if your yard has a combination of different types of soil (ex. Wet, dry, sunny, or shady).

Now it’s time to get dirty. Before you can begin planting your seed you need to make sure your soil is prepared and up to par. To find out more on this go to. I cannot stress this point enough, final soil prep, seeding, and insuring your seed is planted at the proper depth is absolutely critical. The soil should be raked free of all unwanted debris. Large stones or clumps of soil will prevent good root propagation in the area so make sure you remove undesirable material. Large stones may also become a safety hazard upon your first few times mowing your new law so take extra care in this area.

Next step is to spread your seed. Whatever the recommended seed count (per square inch) is, divide that in half and set your spreader up for that seed count. Once you have your spreader all set up, going in one direction only, completely cover the area where you want to have your lawn. With that done, prepare to do a second pass but this time make your pass perpendicular to your initial pass. This method will give you your best coverage. Now that your seed is down you need to rake your seed to approximately a quarter inch in depth and then use a water roller that is only a quarter full to lightly pack that soil down on the seeds.

Now all that is left is for you to ensure your soil stays moist. The top two inches must stay moist until your seeds have good root development. Some slight drying on the surface is fine but should be kept to a minimum. To aid in moisture retention you can use multiple light waterings and straw mulch that stays moist and prevents moisture evaporation. If straw is used spread it out so you can see about a third of the soil through it.

You may also consider using a herbicide for weed control. Make sure to use a product that is labelled for Newly Seeded Lawns. If you do not feel comfortable working with chemicals there are numerous professional pesticide applicators for hire in the phone book.

Click here for more tips about how to plant in your garden.

Driveways, patios, fencing and garden ideas

driveway and patios

This site features articles written by professionals aimed at giving you advice on patio, driveway, fencing and garden design ideas. The content has been complied from fencing and paving contractors to give you tips that you might not find elsewhere. You can use the search box to find specific solutions or start browsing through the ‘Recent Posts’ menu on the right.

Included in the website you will find pages about patios, such as patio furniture, patio heaters and patio design ideas. We look at all aspects from laying patio pavers, to cleaning patios, to the little extras like a new patio umbrella or table set.

The driveways category features the best driveway materials, driveway gates, driveway sealing and much more. Again we cover everything from choosing the best driveway contractor, to what is the cheapest driveway option, to driveway cleaning. Then you may want to consider future extras like a driveway alarm.

We cover fencing in detail with articles on picket fences, vinyl fencing, fencing supplies etc… We look the the different types you might need such as privacy fencing, security fencing, electric fencing, wood panels, wire fencing and more. Fencing supplies advice is also offered.

Although not a gardening site, we do look at garden furniture, garden sets, garden lights and much more. There are often garden improvements that can be carried out when a paving contractor is working at your home. It makes sense therefore to include these extras like garden storage sheds and garden design ideas.

Please feel free to leave comments at the end of posts on this site. It will help us and other readers to gain further insight into outdoor home improvements ideas. For the DIY lovers there are a few pages listed below our header graphic giving an overview of what is involved in DIY paving, DIY woodworking and other DIY garden ideas.

This site has been made to provide a one stop resource for exterior home improvements. This starts with choosing which materials to use for a project and how to pick the best contractor for the job. Because this site has input from contractors we have some insider advice which will help you get the best job for the right price. We can also advise on the best materials too, for example using Indian sandstone paving is far cheaper than using local travertine paving on a patio.

There are so many people that get taken advantage of when it comes to this kind of work. We want to provide a helpful service so that you can make informed decisions. There is nothing worse than that feeling of being ripped off by a paving contractor or any other type for that matter. Contractors are often good people but there are some bad eggs, and we want you to avoid them. Getting a patio, driveway or fencing done badly will leave you feeling regretful, or you can pay for the job again. Avoid this by following our guides and you will learn how to choose the best materials and contractors.

Looking for more tips about driveway? Check out Fundamental Siteworks now!